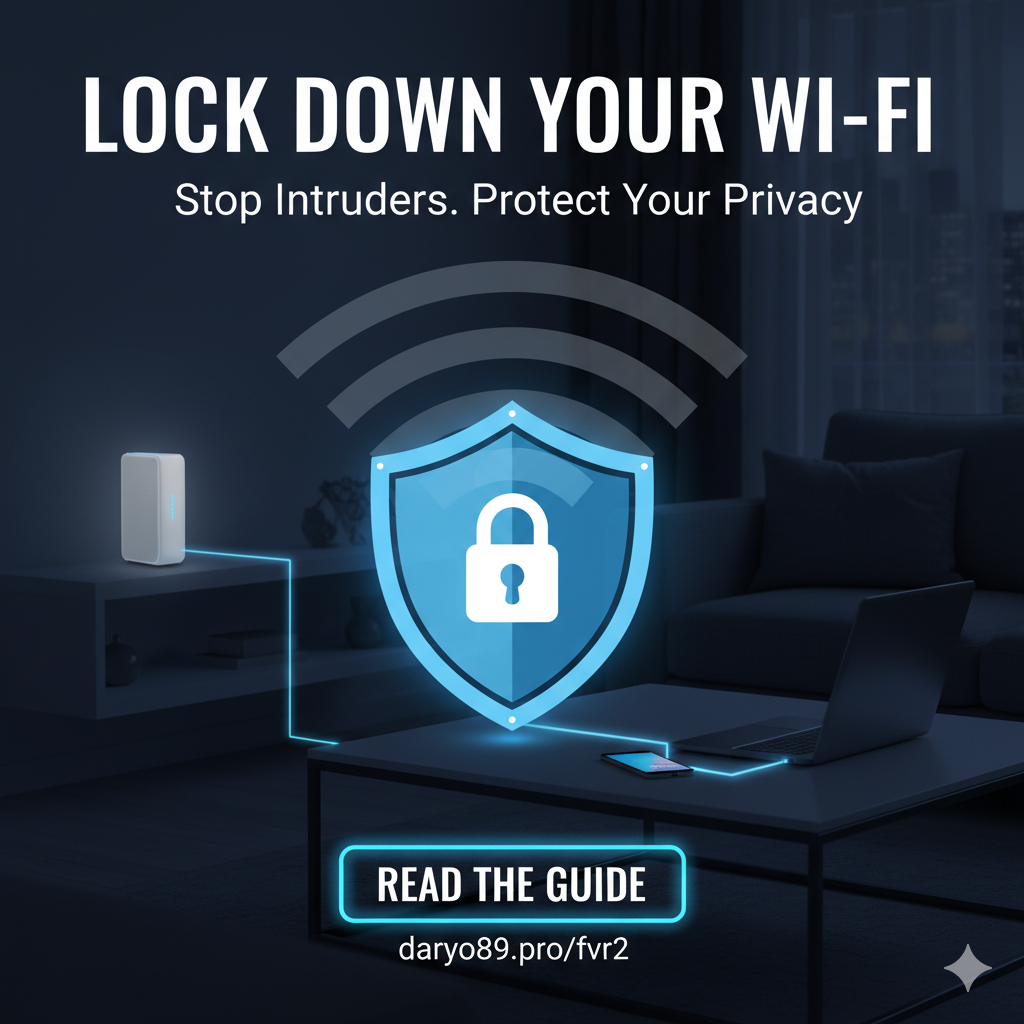
Your Digital Front Door: A Simple Guide to Locking Down Your Home Wi-Fi
Your home Wi-Fi network is the digital front door to your life. It’s how your computers, phones, tablets, smart TVs, and speakers connect to the world. Just like your physical front door, it needs a strong lock to keep unwanted visitors out. An unsecured or poorly secured Wi-Fi network is like leaving that door unlocked and wide open. Anyone nearby could potentially walk in, use your internet connection, and in some cases, even gain access to the personal information stored on your devices.
The risks of an unsecured network range from the annoying to the severe. A neighbor might connect to your Wi-fi to stream movies, slowing down your own connection to a crawl. In a more serious scenario, an intruder could use your network to access your private files, photos, and financial information, or even use your internet connection to conduct illegal activities, leaving you to deal with the consequences.
The good news is that securing this digital front door is not a complicated task reserved for tech experts. It’s a straightforward and manageable project, much like changing the locks and setting up a security system for a new house. This guide will serve as your friendly, step-by-step manual. It will walk you through every stage of the process, explaining not just what to do, but why it’s important, all in plain, simple English.
Together, we will build a robust, layered defense for your digital home. The journey is broken down into three simple parts:
- Mastering Your Passwords: We’ll forge the two essential keys that lock and unlock your network.
- Fortifying Your Router’s Settings: We’ll reinforce the digital walls, windows, and backdoors of your network.
- Safely Welcoming Guests: We’ll build a secure “guest house” for visitors and smart devices, keeping your main home private.
By the end of this guide, you will have transformed your network from a default, vulnerable state into a secure digital fortress.
Section 1: The Two Keys to Your Digital Kingdom: Mastering Router & Wi-Fi Passwords
The absolute foundation of your network’s security rests on its passwords. However, this is where the single most common and dangerous misunderstanding occurs. Most people believe their Wi-Fi network has only one password. In reality, your router—the small box that creates your Wi-Fi network—has two separate sets of login credentials, and failing to secure both is the equivalent of locking your front door but leaving the master key to the entire house under the doormat.
An intruder who can access your router’s settings has complete control. They can view your Wi-Fi password, change it to lock you out, spy on your internet traffic, and disable other security features you may have enabled. Therefore, before we do anything else, it is critical to understand and secure both of these digital keys.
- The Wi-Fi Password (Your Front Door Key): This is the password you and your family use every day to connect your phones, laptops, and other devices to the internet. This is the key to the front door.
- The Router Admin Password (The Master Key): This is the password that unlocks the router’s control panel—the settings menu where you can change the Wi-Fi password, update security, and manage the entire network. This is the master key to the house and its security system.
Many users will create a strong password for their Wi-Fi network but completely neglect the router’s admin password, leaving it as the factory default, such as “admin” or “password”. An intruder who is connected to the network can easily guess this default admin password, log into the control panel, and simply look up the “strong” Wi-Fi password, making all your effort worthless. Securing both is the only way to be truly safe.
Subsection 1.1: Crafting an Unbreakable Wi-Fi Password (Your Front Door Key)
The password you use to connect to your Wi-Fi is your first line of defense. The default password printed on the sticker on your router is often generic or follows a predictable pattern known to hackers. Similarly, passwords based on personal information like your name, pet’s name, or birthday are incredibly easy for others to guess.
The secret to a truly strong password in the modern era is not a confusing jumble of symbols, but length. Security experts and even government agencies now agree that a long password is significantly harder for computers to crack than a short, complex one. While a minimum of 12-14 characters is often cited, for something as important as your Wi-Fi, aiming for
15 to 20 characters or more is the gold standard.
The easiest way to create a long, secure, and yet memorable password is to use a passphrase. Instead of trying to remember something like J%7*kL!2@pQ, you simply string together several random, unrelated words. Consider these examples:
PurpleMonkeyDishwasherStarsCorrectHorseBatteryStapleSingingWhaleFliesOverGreenMoon
A passphrase can also be a full sentence that is easy for you to remember but impossible for a machine to guess. You can even substitute numbers or symbols for added complexity, like IHave5Dogs!and1Cat. This approach gives you the immense security of a long password without the headache of trying to remember a random string of characters.
Do’s and Don’ts of Wi-Fi Passwords
- DO: Use a passphrase of at least 15-20 characters.
- DO: Mix uppercase letters, lowercase letters, numbers, and symbols if you can do so in a way that is still memorable to you.
- DO: Change your password every six months to a year, or immediately if you ever suspect someone unauthorized has gained access.
- DON’T: Use any personal information, such as names, addresses, phone numbers, or birthdates.
- DON’T: Use the default password that came with the router.
- DON’T: Reuse a password that you use for any other online account, like your email or online banking.
Subsection 1.2: Securing the Control Panel: Your Router’s Admin Password (The Master Key)
The administrator account for your router is the “god mode” for your entire network. It grants access to every single setting, including the ability to see and change the Wi-Fi password. To make setup easy, manufacturers ship every router of a specific model with the same, publicly known default username and password. These are often incredibly simple, like
admin for the username and password for the password.
Leaving this default login unchanged is the most critical security mistake a home user can make. It is the digital equivalent of leaving the master key to your home, your car, and your safe sitting on the front porch for anyone to pick up. An attacker who gets onto your network (perhaps by guessing a weak Wi-Fi password or being a guest in your home) can use these default credentials to take complete control. They could lock you out of your own network, monitor all your internet activity, redirect you to malicious websites, or disable your security settings.
It is absolutely essential to change this master key. You should change the default administrator password to a new, unique, and strong one, using the same passphrase principles discussed above. If your router allows it, you should also change the administrator username from “admin” to something unique as well, which adds another layer of security.
Subsection 1.3: The “How-To”: A Step-by-Step Guide to Accessing Your Router’s Settings
Accessing your router’s control panel for the first time can feel like the most intimidating part of this process, but rest assured it is a straightforward procedure that you typically only need to do once.
Step 1: Connect Directly with an Ethernet Cable
While you can do this over Wi-Fi, the most reliable method is to connect your computer directly to the router using an Ethernet cable (the cable that often has a blue or yellow tip and looks like a slightly larger phone cord). Plug one end into your computer and the other into one of the numbered “LAN” ports on the back of your router. This direct connection bypasses any Wi-Fi password issues and ensures you won’t get disconnected while making important changes.
Step 2: Find Your Router’s Address (IP Address)
Your router has a specific address on your home network, much like a house has a street address. This is usually a series of numbers called an IP address. You need this address to tell your web browser where to find the router’s login page.
While you can try common default addresses like 192.168.1.1, 192.168.0.1, or 10.0.0.1, the foolproof way is to look it up on your computer. Some router brands also use friendly web addresses like
http://routerlogin.net (for Netgear) or http://dlinkrouter.local (for D-Link). The table below provides the most reliable method for finding the correct address.
| On a Windows Computer | On a macOS Computer |
| 1. Press the Windows Key and the R key at the same time to open the “Run” box. | 1. Click the Apple menu in the top-left corner of your screen. |
2. In the box, type cmd and press Enter. A black command window will appear. | 2. Select System Settings (on newer Macs) or System Preferences (on older Macs). |
3. In that black window, type ipconfig and press Enter. | 3. Click on the Network icon. |
4. A lot of text will appear. Look for the line that says “Default Gateway”. The number next to it (e.g., 192.168.1.1) is your router’s address. | 4. Select your active connection (it will have a green dot) and click the Details… or Advanced… button. |
| 5. Go to the TCP/IP tab. The number listed next to “Router” is your router’s address. |
Step 3: Log In to the Control Panel
Open a web browser (like Chrome, Firefox, or Edge) and type the address you found in Step 2 into the address bar at the top, then press Enter. You should see a login page asking for a username and password.
This is where you’ll use the default administrator credentials. If you’ve never changed them, they are almost always printed on a sticker on the bottom or back of your router itself. Common defaults include:
- Username:
admin/ Password:password - Username:
admin/ Password:admin - Username:
admin/ Password: (leave blank)
Step 4: Navigate and Change Both Passwords
Once you are logged in, you will see your router’s control panel. Every manufacturer’s menu looks a little different, but the principles are the same. Look for main sections with names like “Wireless,” “Security,” “Administration,” or “Advanced”.
- To change the Wi-Fi Password: Navigate to the “Wireless” or “Wi-Fi” section. Look for a field labeled “Password,” “Passphrase,” or “Pre-Shared Key (PSK).” This is where you will enter the new, strong passphrase you created for your main Wi-Fi network.
- To change the Admin Password: Navigate to the “Administration,” “System,” or “Advanced” section. Look for an option like “Change Router Password,” “Set Password,” or “Admin Password.” Here, you will change the default password to a new, strong passphrase to secure the master key.
- Save Your Changes: After changing each password, be sure to click the “Save,” “Apply,” or “OK” button. Your router may need to restart to apply the new settings. After it restarts, all your devices will be disconnected from the Wi-Fi. You will need to reconnect them using your new Wi-Fi password.
Troubleshooting Tip: If you have previously changed the admin password and have forgotten it, you can perform a factory reset. Look for a tiny, recessed “Reset” button on the back of your router. While the router is plugged in, use a paperclip to press and hold this button for about 30 seconds. This will erase all your custom settings and restore the router to its factory defaults, including the default admin username and password printed on the sticker.
Section 2: Fortifying the Walls: Essential Router Security Settings for Beginners
With strong, unique passwords acting as your keys, it’s time to reinforce the structure of your digital home. The settings inside your router are like the locks on your windows, the alarm system, and the strength of the walls themselves. Simply adjusting a few of these settings can dramatically increase your security.
These settings are not just a random checklist of options; they form an interconnected security system. For example, enabling the strongest encryption makes your strong password even harder for an attacker to crack. Disabling a vulnerable feature like WPS prevents that same strong password from being bypassed entirely. And keeping your router’s software updated patches the very holes in the walls that these other settings are designed to protect. By adjusting each one, you are building a cohesive, multi-layered defense where each part strengthens the others.
Subsection 2.1: Choosing the Right Lock: Understanding Wi-Fi Encryption (WPA3/WPA2)
Encryption is the process of scrambling all the information sent over your Wi-Fi network into a secret code. Only your devices and your router have the key to unscramble this code, which means that even if an intruder could “listen in” on your Wi-Fi signal, the data they captured would be unreadable nonsense.
Inside your router’s “Wireless Security” settings, you will find several encryption options. It is vital to choose the strongest one available.
- The Best Option: WPA3 Personal. This is the newest, most secure encryption standard available today. If your router and devices support it, this should be your first choice. It provides superior protection against attacks that try to guess your password.
- The Compatibility Option: WPA2/WPA3 Transitional. If you have some older devices (like an old laptop or smart device) that can’t connect after you select WPA3, this “transitional” or “mixed” mode is the next best choice. It allows newer devices to use the superior security of WPA3 while still allowing older devices to connect using the slightly older WPA2 standard.
- The Minimum Standard: WPA2 Personal (AES). If your router does not offer WPA3, you must ensure you are using at least WPA2 Personal. When selecting WPA2, you may see an additional option for “Encryption Type.” Always choose AES, as it is far more secure than the older TKIP option.
What to Avoid at All Costs: Under no circumstances should you use the outdated and broken security standards WEP or WPA (the original, without a “2” or “3”). These are like using a lock from the 1950s; they can be broken by a hacker with basic tools in a matter of minutes. Similarly, avoid any setting that mentions
TKIP.
Subsection 2.2: Going Undercover: Changing Your Network’s Name (SSID)
The Service Set Identifier, or SSID, is simply the public name of your Wi-Fi network—the name that appears in the list of available networks on your phone or computer. When you get a new router, it comes with a default SSID, which is often the manufacturer’s name, like “Linksys,” “NETGEAR24,” or “xfinitywifi”.
Broadcasting the manufacturer’s name is like putting a sign on your lawn that says, “This house was built by Acme Builders.” It gives a potential intruder a valuable piece of information. They immediately know the brand of your router and can look up any known security vulnerabilities or default administrator passwords associated with that specific brand, making their job much easier.
You should change your SSID to something unique that does not reveal any personal information.
- Good SSID Examples: “Fortress,” “TheMatrix,” “PrettyFlyForAWiFi”
- Bad SSID Examples: “SmithFamilyWiFi,” “Apartment4B,” “Johns-iPhone”
A Note on “Hidden Networks”: Some routers offer an option to “hide” your SSID, meaning it won’t broadcast its name publicly. While this sounds like a good security measure, it is largely ineffective. Determined attackers have tools that can easily discover hidden networks. Furthermore, hiding your network can often create connection problems and headaches for your own legitimate devices. It is better to rely on strong encryption and a strong password rather than trying to be invisible.
Subsection 2.3: Closing Backdoors: Why You Must Disable Risky Features
Modern routers often come with features designed for convenience. Unfortunately, some of these features create significant security backdoors that hackers can exploit. It is critical to find and disable them.
Wi-Fi Protected Setup (WPS)
WPS was created to make connecting new devices easier. Instead of typing in a long password, you could just press a button on the router or enter a short, 8-digit PIN. While convenient, this feature contains a catastrophic security flaw. Due to a design error in how the PIN is checked, a hacker can use automated software to guess the 8-digit PIN in a matter of hours, and sometimes even minutes. Once they have the PIN, the router will simply hand over your full Wi-Fi password, no matter how long or complex you made it.
Leaving WPS enabled completely negates the security of a strong password. It is a wide-open backdoor that must be permanently closed. Log in to your router’s settings, find the section for WPS, and disable it entirely.
Remote Management / Remote Administration
This feature allows the router’s control panel to be accessed over the internet, from anywhere in the world, not just from within your home network. Unless you have a very specific and advanced reason for needing this (which most home users do not), it should be disabled. If left on, it exposes your router’s login page to the entire internet, allowing hackers from across the globe to try and guess your administrator password and take control of your network. Look for settings like
“Remote Management,” “Remote Administration,” or “WAN Access” and ensure they are turned off.
Universal Plug and Play (UPnP)
UPnP is a feature that allows devices on your network (like gaming consoles or smart cameras) to automatically open doors—known as “ports”—in your router’s firewall to allow them to communicate with the internet. While this can make some applications work more smoothly, it is also a security risk. Malware that infects one of your devices can exploit UPnP to open its own malicious ports, creating a pathway for an attacker to get into your network. For maximum security, it is recommended to find the UPnP setting and
disable it.
Subsection 2.4: Your Digital Security Guard: Checking Your Router’s Firewall
Think of your router’s firewall as a dedicated security guard standing between your private home network and the public internet. Its job is to inspect every piece of data trying to come into your network and block anything that looks suspicious, unsolicited, or malicious. It is your primary defense against the constant automated scans and attacks that happen across the internet every day.
The good news is that virtually all modern routers have a built-in firewall, and it is almost always enabled by default. You generally do not need to do anything to turn it on. However, it is a good practice to log into your router’s settings and simply verify that it is active. Look for a section named
“Firewall” or “Security” and confirm that it is enabled. For the average home user, the default firewall settings provide a robust level of protection without any complex configuration.
Subsection 2.5: Patching the Holes: The Importance of Firmware Updates
The “firmware” is the internal software that acts as the brain of your router. It controls how the router operates, manages your connections, and runs all of its security features. Just like the software on your computer or phone, this firmware can sometimes have bugs or security holes (vulnerabilities) that are discovered after the router is sold.
When manufacturers discover these vulnerabilities, they release updates to the firmware to fix them. Keeping your router’s firmware up-to-date is absolutely critical. It is the equivalent of patching a hole that has been discovered in the wall of your house. Running an old, outdated firmware version leaves your network exposed to known attacks that have already been fixed.
To update your firmware, log in to your router’s settings and look for a section called “Firmware Update,” “Router Update,” or something similar, often found under “Administration” or “System.” Many modern routers have a button to automatically check for and install new updates. If your router requires a manual update, you will need to visit the support page on the manufacturer’s website, find your specific router model, and download the latest firmware file to upload to the router.
Section 3: Welcoming Company Safely: The Power of a Guest Wi-Fi Network
One of the most powerful and underutilized security features on modern routers is the ability to create a guest network. Think of it like building a separate, furnished guest house on your property. Your visitors can stay there, use the electricity and water (the internet), but they don’t get a key to your main house, where your family and valuables (your personal data and devices) are kept.
A guest network creates a second, completely separate Wi-Fi network that runs on the same router but is isolated from your primary, private network. This provides several crucial security benefits.
Benefit 1: Protecting Your Personal Data
When a friend or family member connects to your main Wi-Fi network, their device is on the same network as your personal computers, network-attached storage drives, and printers. This could potentially allow them (or malware on their device) to see or access shared files and other sensitive information. A guest network prevents this entirely. Devices connected to the guest network can access the internet, but they cannot see or communicate with any of the devices on your main network.
Benefit 2: Containing Malware
Even with people you trust, you can never be sure their devices are secure. A guest’s phone or laptop could be infected with a virus or malware without their knowledge. If that infected device connects to your main network, the malware could attempt to spread to your other computers. By placing all visitor devices on the isolated guest network, you contain any potential threats to that “guest house,” preventing them from ever reaching your main home.
Benefit 3: The “Smart Device” Quarantine Zone
Perhaps the most important use for a guest network in a modern home is not for human guests, but for your “smart” devices. Things like smart speakers (Amazon Echo, Google Home), smart TVs, security cameras, smart light bulbs, and thermostats are all part of the “Internet of Things” (IoT). While convenient, these devices are often built with less robust security than your computer or phone, making them a more attractive target for hackers.
A compromised smart camera or speaker could become a gateway for an attacker to get inside your network. By connecting all of your IoT devices to the guest network, you place them in a secure quarantine. They can still connect to the internet to function properly, but they are isolated from your main network where your laptop with sensitive financial data and your computer with personal photos reside. This simple step dramatically reduces the risk of a vulnerable smart device compromising your entire digital life.
Subsection 3.2: Setting Up Your Guest House: A Step-by-Step Guide
Creating a guest network is a quick and easy process.
Step 1: Find the Guest Network Setting
Log in to your router’s administrator control panel. Look for a menu option specifically labeled “Guest Network,” “Guest Wi-Fi,” or “Guest Access.” It is often a main category in the settings menu.
Step 2: Enable and Configure the Network
Inside the guest network section, you will typically find a few simple options:
- Enable Guest Network: There will be a checkbox or a toggle switch to turn the feature on. Enable it.
- Set the Network Name (SSID): Give your guest network a clear and distinct name so it’s easy to tell apart from your main network. For example, if your main network is “Fortress,” you could name the guest network “Fortress-Guest”.
- Set a Separate, Strong Password: This is a crucial step. Create a different strong password for your guest network using the same passphrase method as before. This is the password you will give out to visitors. Using a separate password means you never have to reveal the password to your primary, private network.
- Enable Network Isolation: This is the most important security setting for your guest network. Look for an option that says “Network Isolation,” “Client Isolation,” “Guest Isolation,” or a checkbox that says “Allow guests to see each other and access my local network.” You want to ensure that isolation is turned ON and that access to the local network is turned OFF. This is the setting that builds the digital wall between the guest network and your main network.
Step 3: Save Your Settings
Once you have configured the name, password, and isolation settings, click “Save” or “Apply.” Your router might restart. After it comes back online, you will see your new guest network appear in the list of available Wi-Fi networks on your devices, ready and waiting for your visitors and smart devices. Many modern router apps even allow you to create a QR code that guests can scan to connect automatically, making the process even simpler.
Conclusion: Maintaining Your Secure Digital Home
By following the steps in this guide, you have successfully transformed your home Wi-Fi from a vulnerable, open target into a secure and resilient digital fortress. You have accomplished the three critical pillars of network security: you have forged strong, unique keys for access (passwords), you have fortified the walls and locked the backdoors (router settings), and you have built a secure guest house to safely accommodate visitors and smart devices (guest network).
You have taken control of your digital security and are no longer a “Frustrated Home User,” but the confident and capable administrator of your own digital home. Security, however, is not a one-time fix; it is a simple habit of good digital hygiene. To maintain the robust protection you have just established, follow this simple maintenance checklist.
Simple Security Maintenance Checklist
- Every 3 Months: Log into your router’s control panel and check for any new firmware updates. Installing these updates ensures your router has the latest patches against newly discovered security threats.
- Every 6 to 12 Months: Change your Wi-Fi password and your Guest Network password. This ensures that even if a password was compromised, the unauthorized access is temporary.
- Occasionally: When you are logged into your router, take a quick look at the list of “Connected Devices” or “Attached Devices.” Make sure you recognize all the computers, phones, and smart devices listed. If you see anything suspicious that you don’t recognize, it’s a good idea to change your Wi-Fi password immediately to kick the unknown device off your network.
By incorporating these simple habits, you can ensure that your digital front door remains securely locked, protecting you and your family in an increasingly connected world.
Still needs help? No worry contact us for your dedicated quote!


Add comment
You must be logged in to post a comment.